In this article I am going to take a quick walk through of the Kemp LoadMaster VLM-100, a virtual load balancer appliance from Kemp Technologies.
Load balancing has become one of those skills that Exchange Server administrators need to learn, like Active Directory, storage, and PKI. With Exchange 2010 we can load balance and provide high availability for client RPC/MAPI traffic on the Client Access servers.
Of course you can use Windows NLB to load balance an Exchange 2010 CAS Array, but that approach has some downsides in terms of scalability, but more importantly it is simply not as good at covering the number of different failure scenarios that can occur with Client Access servers. In short, NLB is server-aware but not service-aware, so a partial failure (eg the RPC Client Access Service stopping) will cause clients to disconnect rather than be reconnected to another available CAS.
For those of you who are interested in learning about hardware load balancing for Exchange Server 2010, Kemp Technologies offers free 30 day trials of their virtual appliances like the VLM-100.
Disclosure: Kemp Technologies has also provided me a permanent license for other versions of their LoadMaster range as part of their support for the Exchange MVP and blogging communities.
I chose the Hyper-V VM download and imported it into my test lab environment. They also offer VMware and Xen versions, and frankly it is pretty cool how quickly you can get the VLM up and running this way, although you do also need to request a temporary license which can take 24-48 hours to be issued (more on that in a moment).
Getting Started with the Kemp LoadMaster VLM-100
When your new VLM has started you’ll see a Linux-style console and login prompt. You can ignore that though, and instead open your web browser and browse to https://ipaddress where “ipaddress” is the IP shown on the console of the VLM.
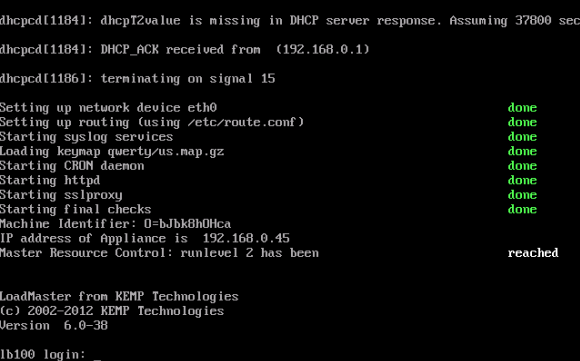
The first thing you’ll need to do when you connect with your web browser is acquire your license key by following the instructions on the page. Because this can take 24-48 hours to be sent to you, if you want to spend the weekend playing with load balancing in your test lab then you should do this step on a Wednesday/Thursday so you’re all ready to go.

With the license key installed you are prompted to login to the VLM.
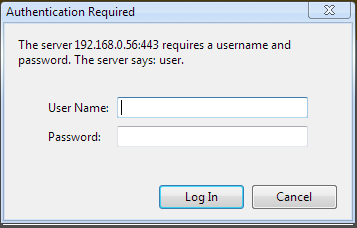
The default login credentials are provided in the quick start guide that you’ll want to download a copy of from the Kemp documentation page. You’ll then be presented with the opportunity to set your own password.

Log in one more time with the new password and you’re ready to begin configuring the VLM.
Configuring the Kemp LoadMaster
In my scenario I have two Exchange 2010 servers in a site that are both installed with the Client Access, Hub Transport and Mailbox server roles. They are also both members of a database availability group.

When I was deploying the servers in this site I did configure a CAS array, however because the DAG members cannot also be members of an NLB cluster, the CAS array’s DNS record simply points at one of the servers. In other words, I have no high availability or load balancing for the CAS array at the moment.
[PS] C:\>Get-ClientAccessArray

Name                Site                 Fqdn                           Members
----                ----                 ----                           -------
cas-headoffice      HeadOffice           outlook-ho.exchangeserverpr... {HO-EX2010-MB1, HO-EX2010-MB2}

[PS] C:\>nslookup outlook-ho
Server:  ho-dc.exchangeserverpro.net
Address:  10.1.1.3

Name:    outlook-ho.exchangeserverpro.net
Address:  10.1.1.21

[PS] C:\>nslookup ho-ex2010-mb1
Server:  ho-dc.exchangeserverpro.net
Address:  10.1.1.3

Name:    ho-ex2010-mb1.exchangeserverpro.net
Address:  10.1.1.21
So my goal is to configure the VLM-100 and then point the CAS array’s DNS record at the load balancer to improve the resilience of the Client Access services in this site. To keep things simple I’ll be deploying a one-armed configuration.

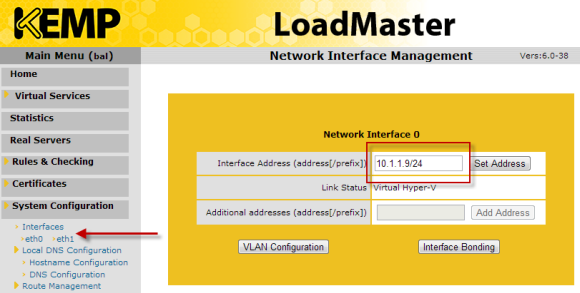
So to begin with I configure a suitable IP address for my test lab environment (obviously this IP address should be reachable from an existing computer on your network so you can reconnect and continue configuration after setting it).
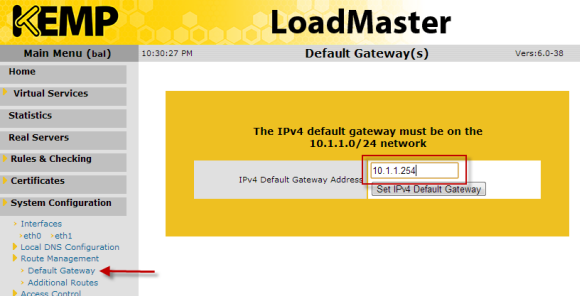
After configuring the IP address you should also configure the default gateway.
Configuring Virtual Services
Next it is time to configure the virtual services. There are two approaches you can take for this. The first is to work through the documentation from Kemp and configure everything manually. In fact reading the documentation is a good idea if you’re new to load balancing as the LoadMaster Configuration Guide covers a lot of the concepts before it gets to the actual configuration steps.
The other approach is to use a template file, which Kemp provides on their documentation page as well. I’ve downloaded the “Core” template and that is the one that I’ll be using in this scenario.
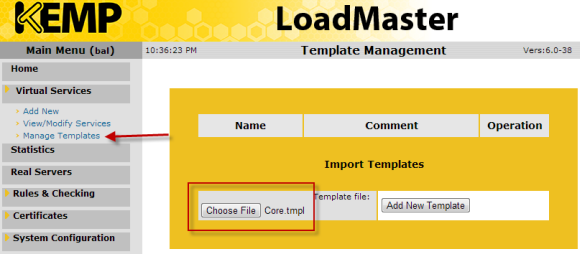
After installing the template the following virtual service templates are created for me.

This means that when I go to add a new virtual service, I can select from those imported templates.
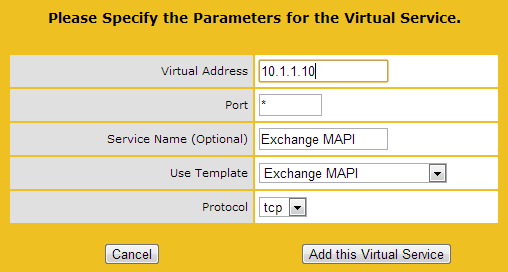
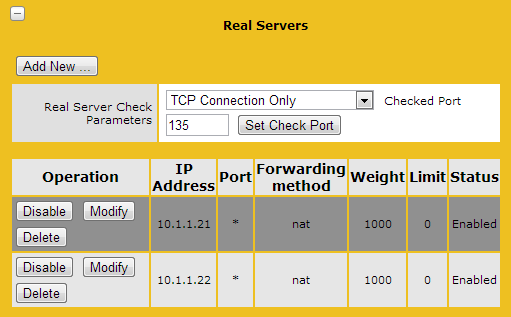
Next I can add in the real server IP addresses (my Client Access servers).
The virtual service has been configured and shows a status of “Up”.
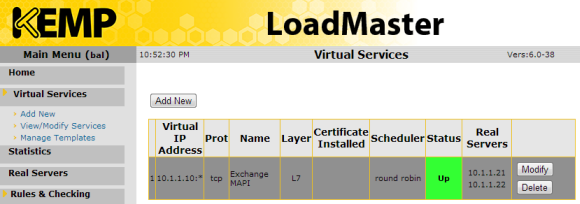
So the next step is to update the DNS record for the CAS array and point it at the virtual IP address I configured for this virtual service.
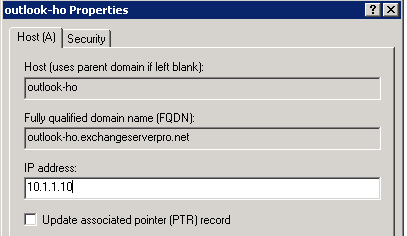
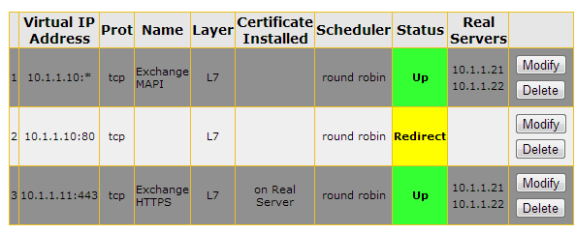
After making sure the old DNS entry had expired and all of my test clients were resolving the name to the new IP I re-launched Outlook on each of them. With four clients connecting to the CAS array the LoadMaster shows the following connection stats.

So it seems to be load balancing the connections just fine. Not only that, if one of the servers’s goes offline the VLM-100 detects that and updates the status accordingly.

I also wanted to create a virtual service to handle OWA, ActiveSync, and Outlook Anywhere. I added a new virtual service using the Exchange HTTPS template.
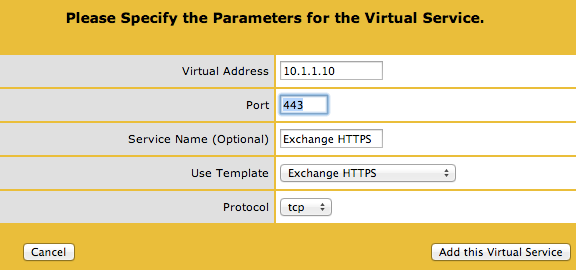
And then once again I configured the real server IP addresses for HTTPS services and then update the DNS record for the OWA/ActiveSync/Outlook Anywhere namespace(s) to point to the load balancer virtual IP address.
Further Configuration Scenarios
After you have a basic load balancing configuration in place there are some more scenarios you can explore to learn more about hardware load balancing for Exchange Server 2010.
My suggestions are to look at:
- Load Balancing with Microsoft Exchange Server 2010 (TechEd Australia 2011)
- Enabling Kerberos Authentication for MAPI Clients
- Configure the Availability Service for Network Load Balanced Computers


Hi Paul. Does this apply to a hardware Kemp LoadMaster 2400? I am trying to make sure I understand how to even install the hardware. If the Kemp is going to be the default gateway of the two CAS servers, then I assume the Kemp will connect directly to my Sonicwall for the outside interface. Do the Two CAS servers connect directly to the ports in the KEMP, or will they stay connected to my internal switch as it is now?
The Real Person!
Author Paul Cunningham acts as a real person and passed all tests against spambots. Anti-Spam by CleanTalk.
There are different ways to implement a load balancer in the network topology. Single-armed, LB as gateway, etc. Kemp has those documented, you should really read up on it first.
Thanks Paul, It helped me 🙂 , Your Posts are always helpful
Pingback: aurora skin rejuvenation system
Pingback: Full Guide
Pingback: Client IP Address Logging in IIS with Source NAT Load Balancer
Hi Paul,
In this configuration did you (or should it be) configure the Exchange servers default gateway as the IP of your load balancer?
Cheers
P
The Real Person!
Author Paul Cunningham acts as a real person and passed all tests against spambots. Anti-Spam by CleanTalk.
I used source NAT, so no need to change default gateway.
Paul,
Does source NAT preserve the client IP? via documentation, in the L7 transparency section:
KEMP recommends changing the default gateway on the Real Servers to point to the LoadMaster. This allows accurate server-side access logging of client IP addressing
http://kemptechnologies.com/files/downloads/documentation/7.0/Deployment_Guides/Deployment_Guide-MS_Exchange_2010.pdf
Thanks!
Nevermind, I found another one of your articles that provides a workaround for the client IP logging:
https://www.practical365.com/logging-client-ip-address-iis-using-load-balancing-source-nat/
Hi Paul,
we have DAG over mailbox servers in exchange 2010
(MBX1,MBX2) in same datacentre but recently we have power cut only for few circuit unfortunately server database mounted on the server was goes down abnormally and other server holding another copy of database is able to take over and exchange clients gets disconnected and unable to send / receive message until the server goes down will be available
I have the following questions
1. can KEMP technology solution handles this scenario
2. How to handle this kind of situation only with exchange 2010
Regards,
Paul,
For the site that you deployed the VLM-100, how many mailboxes were being services and how does the SSL TPS play into this ?
Pingback: Issues With Load Balancing SMTP Traffic
Good one Paul – explained pretty simple. Kemp – anyway is the No.1
Paul, I noticed in your article that you spoke about the term around times for licenses to be issued.
The good news is now that KEMP Technologies has established itself in Singapore and is recruiting in Australia to better support our product in the time zone here.
This will substantially speed up the processing time of these licenses which means that you will have with more certainty regarding the licenses for your weekend of Load Balancing.
Our new regional contact details are on the website. Any of us are here to help.
Thanks
Norbert
The Real Person!
Author Paul Cunningham acts as a real person and passed all tests against spambots. Anti-Spam by CleanTalk.
Good to know Norbert, thanks for the info.